

I remember a simpler time in my life, I must have been five or six years old. I would walk about with this camera around my neck. It belonged to my mother, who in a fit of mad generosity had given it off to me. It was love at first sight, I took it everywhere with me! I don’t know which brand it was or what kind of lens it had, but it was a film camera with a slim, steel and black body. It had a view finder that made everything look so much more beautiful, and the lever to click pictures made the perfect ‘click’. The thing was encased in this gorgeous tan leather case.
If my memory serves me right, I usually wore a hat when I was clicking – one of the floppy variety – and I’m certain I felt pretty professional in my gear. Alas! There is no picture of me with the camera, so I cannot produce proof.
I would potter around the house, garden and terrace peering at quizzical things through my lens. Once I was lucky enough to be able to observe a garden lizard for quite a while…I lay prostrate in the yard, gazing away, comfortable in the knowledge that the camera was there to protect me.
Back to the present-ish, I was looking for toys to buy for little Mr. K close to his birthday. We had already decided to get him a balance bike as the big present – he was turning two after all – but I had saved up a little to be able to splurge on his big day. And toddler cameras were a real thing! It made me wonder if that vintage treasure from mum had fostered my shutter love. But whatever was available in the market was either too ‘flashy’ (I abhor light and sound toys) or was for older kiddos.
The next best thing was to make one. Thankfully, crafty and inspirational parents out there have shared their DIY tutorials on building cameras ranging from simple to actual working models. I chose to keep it simple given my child’s age and my low level of expertise.
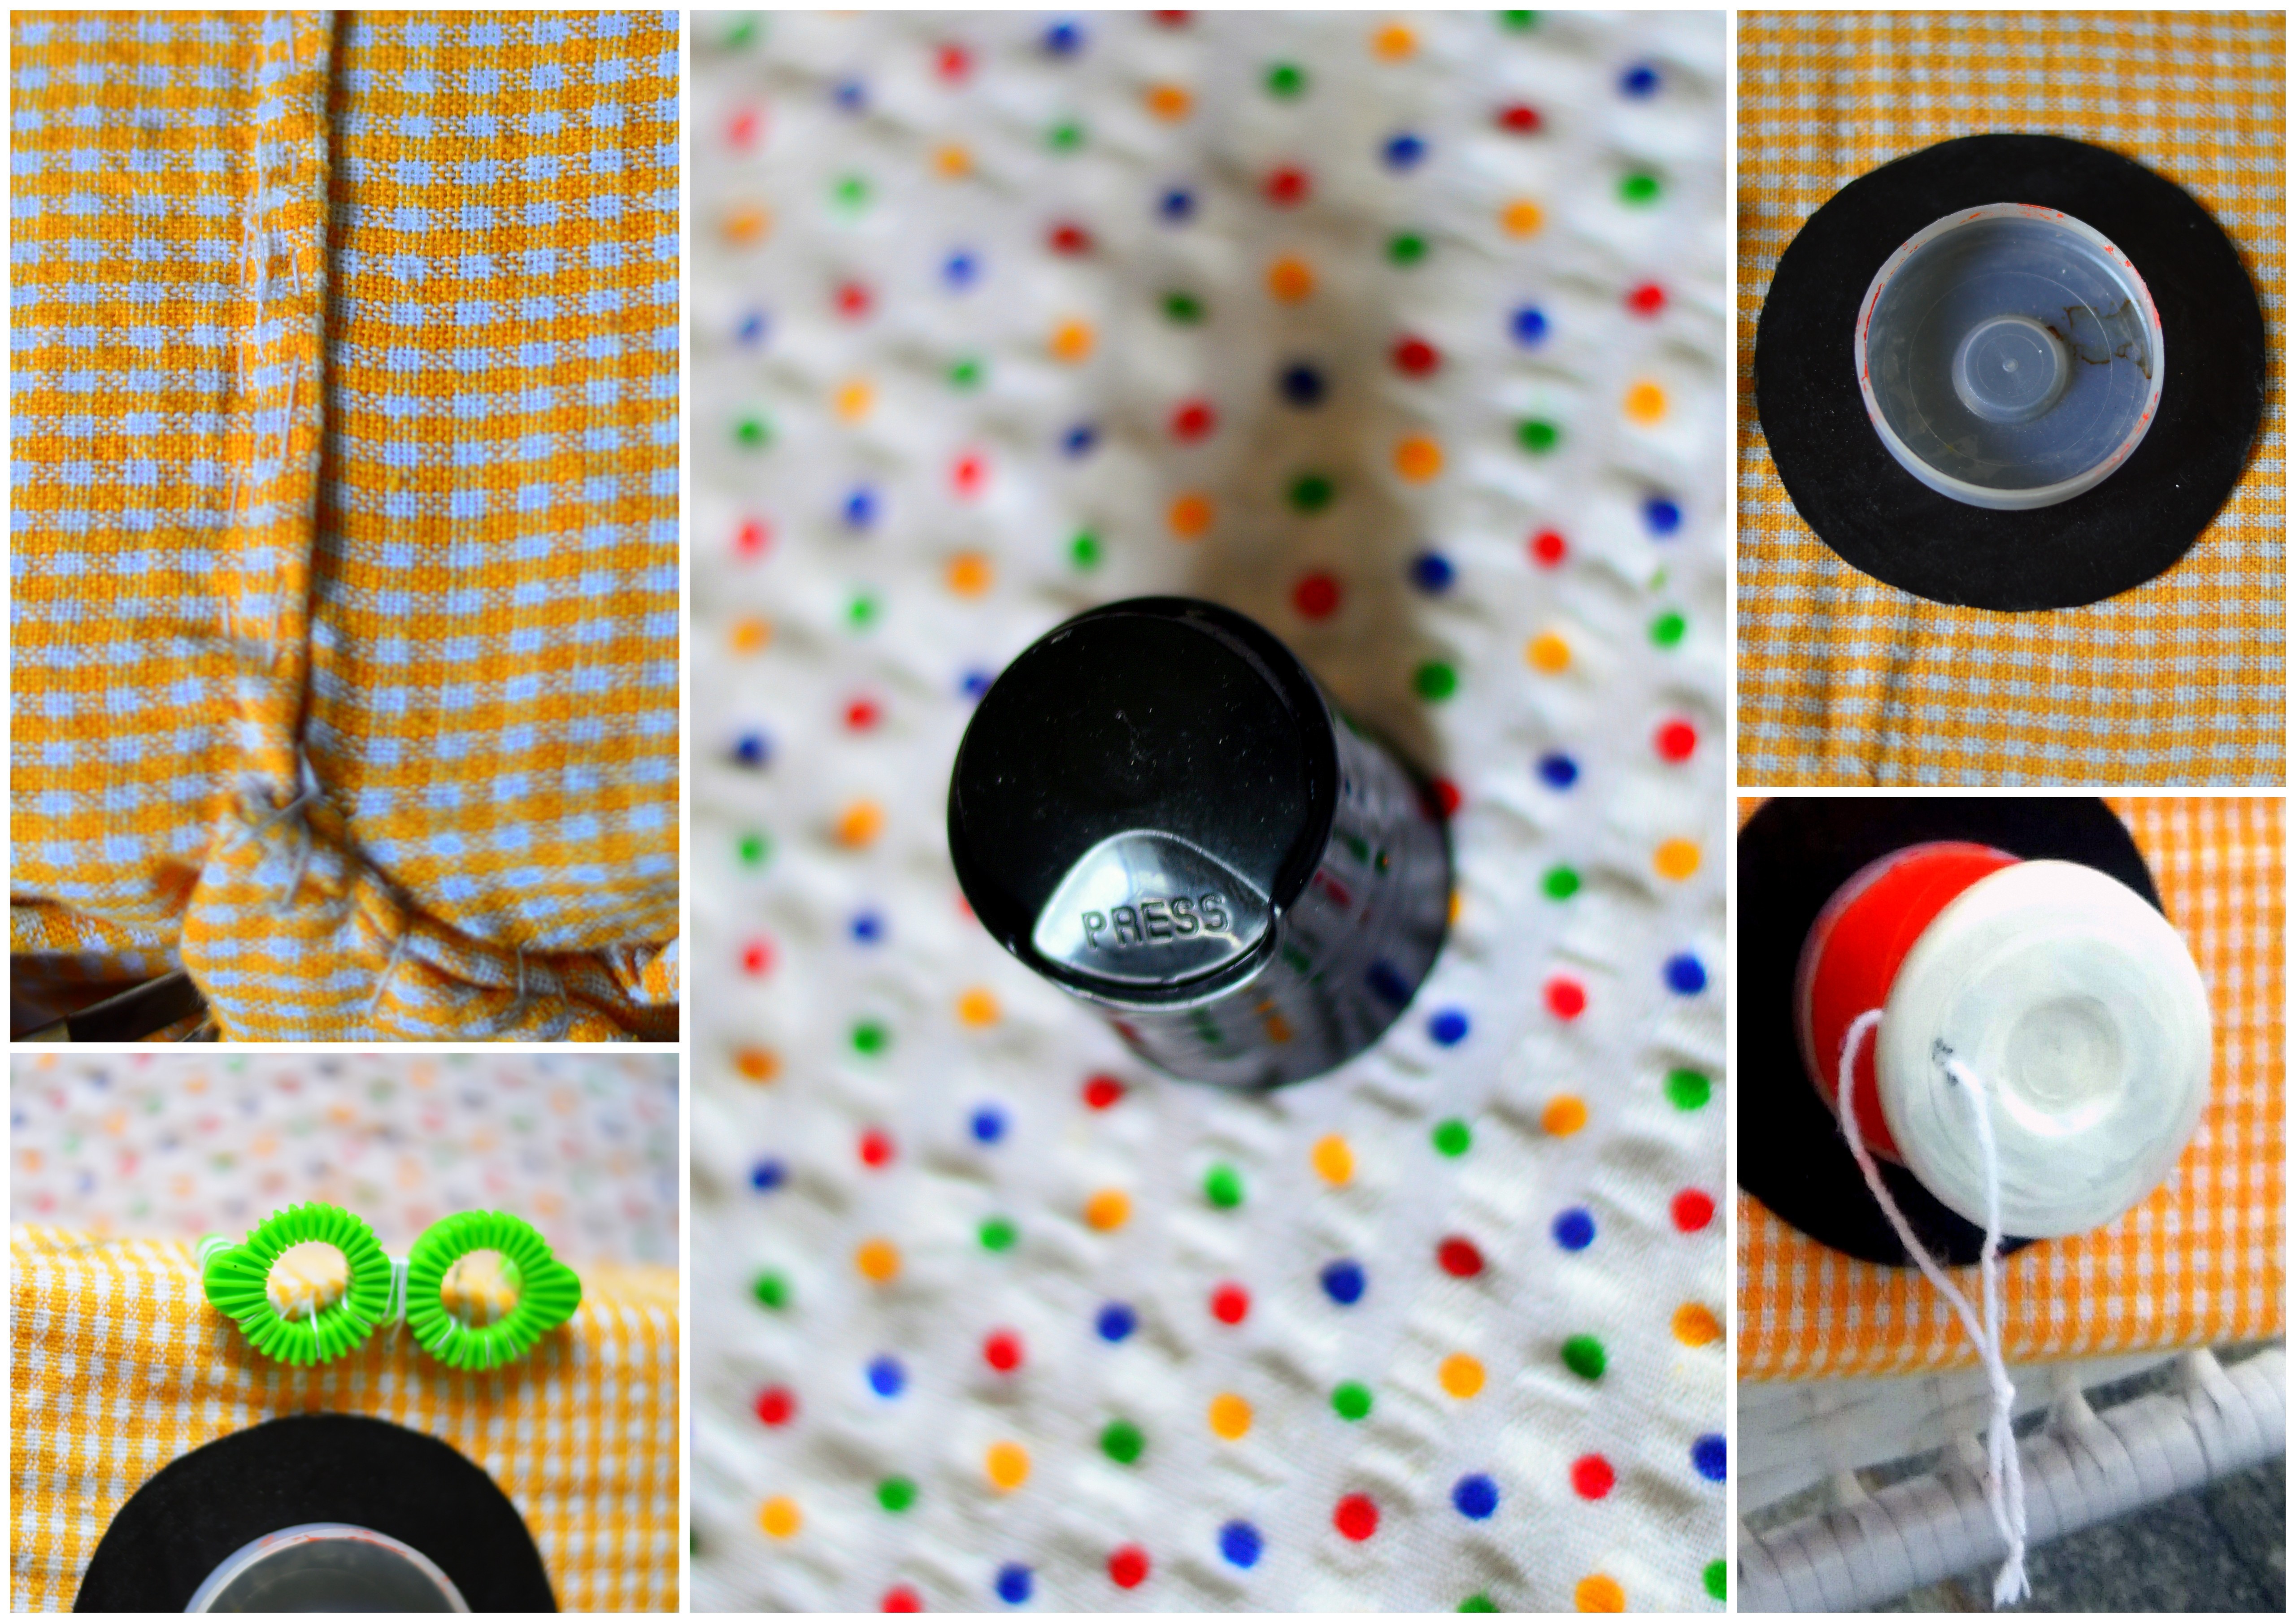
I’m a bit obsessed about re-purposing cardboard, so the natural choice for me was to start with a small cardboard box as the base. The shoe box of Mr. K’s first shoes was the perfect size. I then collected other bits and bobs to put together our funky little camera. You could come up with your own version depending on what you can corral together.
Here’s what I used:
- a small shoe box for the base
- a cloth kitchen-towel to cover the camera so that it lasts longer. You can go with a paper cover too
- a cardboard circle cut out for the lens edge. I painted it black to add a punchy contrast
- a ‘viewfinder’ – a plastic piece from a ‘dismantled’ bubble gun
- a cap from a shampoo bottle for the magical ‘click’ sound
- a strap/belt from an old satchel
- a needle and some thread
- a bottle of Fevicol MR General Purpose
You can create a cute camera with just these supplies. The lens just adds some flair and makes Mr. K feel very important. I also like the fact that it adds a bit more scope for interactive play.
For the lens:
- a 2-inch piece from the cardboard of a kitchen paper roll
- 2 plastic caps from the cans of a bottled-water dispenser
- acrylic paint
- a 3-inch bit of string
Armed with these supplies, I began my project. First, I stuffed the shoe box with some newspaper and bubble wrap to prevent it from collapsing when stress tested by the said toddler. Then I covered it with the kitchen towel and sewed up the edges that gave me a neat, rectangular box to work with. Then I glued on the black circle to the center of the front face of the box using Fevicol. To this, I stuck one of the caps from the water dispenser can to create a holding point for the ‘lens’. Then, I sewed on the ‘viewfinder’ and stuck the shampoo bottle cap on the top face of the camera. Since the bottle cap was plastic, it refused to be held down by Fevicol…I heated the bottom edge on a candle flame and pressed down firmly to fuse it with the cloth. The pictures below try to capture the key points.
Now, on to the lens. Since I was working with a yellow kitchen towel and had found a bright vermilion strap for the camera, I decided to go with a similar colour for the lens. I painted the piece of kitchen towel roll a sunny vermilion and left it to dry for a few minutes. Once it was dry, I pierced a tiny hole near one edge and inserted the bit of string. The second cap of the water dispenser (I painted this white with acrylic paint) became the ‘lens cover’ once I had strung it through and knotted off the tiny bit of string.
Ta-da! Our homemade, simply adorable little camera was ready for a test drive. After attaching the strap to the sides, I adjusted the length to fit my bub. It had been a major task fending him off until I had completed the task, so he was thrilled to bits when I finally handed the camera to him. And he went shutter-happy in an instant!
I steal it when he’s not looking just to go, “Click, click, click.” Okay, I might be too much in love with it. I hope Mr. K enjoys it for a long time.


